
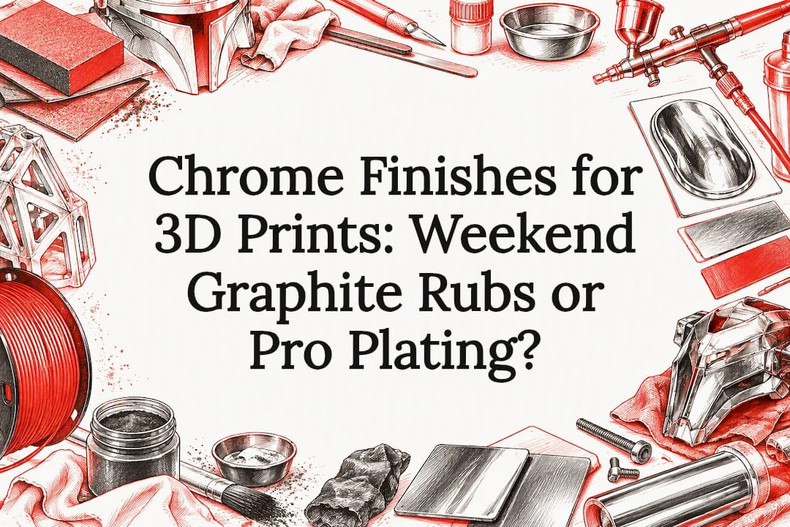
Chrome Finishes for 3D Prints: Weekend Graphite Rubs or Pro Plating?

You can achieve a convincing chrome look three ways: quick spray-chrome over a gloss-black base for the easiest result, a maker-grade Alumaluster or graphite rub process for workshop-quality cosplay armor, or true chrome through professional electroplating for display pieces that need real metal durability. Each path trades speed for permanence, so the right choice depends on whether the piece gets touched, worn, or just displayed.
TL;DR:
- Spray chrome needs 48 to 72 hours to cure in a dust free enclosure; clear coat adds protection but can dull its mirror brightness.
- Wearable armor fares better with graphite or Alumaluster under 2K clear; graphite’s second rub must happen within 3 to 5 hours.
- True electroplating requires a platable substrate such as ABS or ABS plastic blends; PLA and untreated PETG do not plate reliably without specialized preparation.
- When spraying chrome paints or 2K clear, use a respirator rated by NIOSH with organic vapor cartridges, active airflow, gloves, and eye protection.
Table of Contents
- Comparing spray paint, graphite rub, Alumaluster, and plating
- Surface preparation: sanding, filling, and getting to mirror smooth
- Spray chrome paint: product picks and spraying technique
- Graphite and Alumaluster: the maker-favored workshop methods
- Electroplating and vacuum metallizing for true chrome
- Safety and ventilation for solvent-heavy sprays and clears
- Tools and supplies checklist for a chrome finish project
- Troubleshooting orange peel, runs, and dull spots
- Finishing large props: scale, timing, and staged clearing
- Why we favor sealed metallic finishes for wearable and display pieces
- Commission a finished chrome-grade piece from our team
- FAQ
- Sources
Comparing spray paint, graphite rub, Alumaluster, and plating
Each chrome method produces a different look and asks for a different time investment, so matching the method to the project matters more than chasing the shiniest option.
- Spray chrome paint: a fast, mirror-like sheen over polished gloss black, good for small display models, ready in a few hours of spraying plus days of cure time.
- Graphite rub: a soft metallic sheen embedded into clear coat, more fingerprint-resistant once sealed, suited to handheld props and armor pieces that get handled.
- Alumaluster spray: a brighter, more screen-accurate chrome reading, best for display pieces where the sheen needs to read from a distance.
- Electroplating or vacuum metallizing: authentic chrome metal on a platable substrate, reserved for pro shops and pieces where durability and realism matter most.
Spray paint and graphite rubs take a weekend of prep and cure. Plating adds shipping time and lead days since it runs through a professional service rather than a home shop.
Surface preparation: sanding, filling, and getting to mirror smooth
Every chrome method, paint, rub, or plating, fails without a flawless substrate. Layer lines, pinholes, and sanding scratches all show through a reflective finish, so prep work is where most of the final quality gets decided.
- Knock down print defects with 220 to 320 grit sandpaper, focusing on visible layer lines and seams.
- Fill gaps, seams, and pinholes with a filler or XTC-3D, then sand flush once cured.
- Move through 400 and 600 grit to erase sanding marks left by the coarser paper.
- Apply a high-build primer, let it cure, then sand between coats to level any remaining texture.
- Finish wet-sanding with 1000 to 2000 grit for a glass-smooth surface before the gloss-black base coat.
This progression mirrors the prep routine that works well for hiding layer lines on large props, where even small surface flaws become obvious under bright light.
Pro Tip: Hold the part at an angle under a bright lamp between sanding passes; raking light reveals scratches and low spots that look invisible under normal room lighting.
Spray chrome paint: product picks and spraying technique
Spray chrome is the most accessible path, but can quality varies enormously. Maker tests consistently show that premium spray-can chrome paints outperform generic hardware-store cans, with Krylon Premium Original Chrome and OneTake (also sold as ONETAKE Chrome Finish) standing out for reflectivity and evenness.
- Shake the can thoroughly, longer than the label suggests, to fully mix the metallic pigment.
- Spray in light, even arcs from about 6 to 8 inches (15 to 20 centimeters) away, keeping the can moving.
- Build the finish in several very light passes rather than one heavy coat, which causes runs and dulls the mirror effect.
- Watch closely for sagging or pooling in corners and recessed details, where overspray tends to collect.
Chrome spray paints stay tacky far longer than typical paints. Maker tutorials warn that fingerprints or dust landing during this extended tack window will mar the finish permanently, so plan on 48 to 72 hours of dust-free curing in a closed box before handling the part again. Clear-coating a chrome spray is optional: it adds protection and durability but can slightly dull the mirror brightness, so test on a scrap piece first if maximum shine matters more than toughness.
Graphite and Alumaluster: the maker-favored workshop methods
These two workflows, popularized in maker communities, start from the same gloss-black, mirror-polished base and rely on thin metallic layers sealed under 2K clear to produce a convincing chrome read.
Path A, graphite rub:
- Lay down a gloss-black base coat and let it cure fully.
- Apply a thin clear tack coat over the black.
- Rub graphite powder into the surface by hand once the clear is tacky.
- Seal with a second clear coat, then rub a second layer of graphite into that still-soft clear.
- Let the piece cure completely before handling.
Path B, Alumaluster:
- Apply the gloss-black base and cure.
- Spray ultra-light Alumaluster passes building to roughly 70% opacity, keeping one small reference area at full coverage for comparison.
- Let the metallic layer flash off before sealing.
- Seal under a 2K clear coat mixed to the manufacturer’s airbrush or HVLP ratio.
The graphite method’s critical window is the 3 to 5 hour gap for the second rub: the first clear must be dry enough to hold the embedded powder but still soft enough for the second layer to bite in, and missing it weakens the finish’s durability.
Pro Tip: Check Alumaluster coverage under dim lighting rather than a bright shop lamp; the chrome effect reads very differently once the piece leaves direct light.
Electroplating and vacuum metallizing for true chrome
True chrome plating is an electroplating process that deposits actual chromium metal, producing a hard, genuinely reflective surface rather than a painted illusion. Paint-based chrome effects mimic the look with pigments and binders, but they can’t match plated metal’s durability.
Plating plastic reliably requires a platable substrate, typically ABS or ABS-PC blends, plus a pre-treatment stack of etching and electroless copper or nickel before the final chromium layer goes on. PLA and untreated PETG don’t plate reliably without specialized lab preparation. Home-scale electroplating is possible but demands conductive pre-coating and multiple plated layers before chrome goes on, which is why many makers send parts to professional platers instead of running the chemistry themselves.
Vacuum metallizing offers a lighter, more affordable reflective alternative to full electroplating, though it produces a thinner metal layer and different durability than true plating. Either pro route adds cost and lead time, so it’s usually reserved for pieces where authentic metal matters more than turnaround speed.

Safety and ventilation for solvent-heavy sprays and clears
Spray chrome, Alumaluster, and 2K clears all involve solvent-heavy or flammable materials, so OSHA guidance on spray finishing recommends engineering controls like ventilation, monitoring solvent concentrations, and wearing appropriate PPE during any spray session.
- Work in a space with active airflow, ideally a spray booth or open garage with a fan pulling fumes away from you.
- Wear a NIOSH-rated respirator with organic vapor cartridges, not a basic dust mask, when spraying 2K clears or chrome paints.
- Use nitrile or butyl gloves to keep solvents off your skin, and wear eye protection against overspray.
- Keep flammable coatings away from pilot lights, space heaters, and other ignition sources, and store rags in a sealed metal container.
Tools and supplies checklist for a chrome finish project
A basic rattle-can setup works for small test pieces, but an airbrush or HVLP gun gives far more control over the light passes that chrome paint and Alumaluster both demand.
- Airbrush or HVLP gun with a small compressor for even, adjustable coats.
- NIOSH-rated respirator, nitrile or butyl gloves, and eye protection.
- Sandpaper from 220 up through 2000 grit, plus polishing compound for the final buff.
- High-build primer, gloss-black base coat, Alumaluster or graphite powder, and 2K clear.
The respirator and airbrush are the two upgrades worth spending more on. Everything else, from sandpaper to filler, performs about the same across price points.
Troubleshooting orange peel, runs, and dull spots
Orange peel shows up as a bumpy, textured surface from spraying too far away or too heavy; dust inclusions look like tiny bumps trapped under the clear; fingerprints appear as dull smudges where skin oils touched the tacky chrome layer.

Light defects often buff out with wet-sanding at 2000 grit followed by polishing compound. Deeper runs or heavy contamination usually mean stripping that section and recoating rather than fighting it with sandpaper. Before your next attempt, double check your dust control, spray distance, and cure environment, since practitioner experience consistently points to prep and clean curing conditions as the deciding factors in a chrome finish’s final quality.
Finishing large props: scale, timing, and staged clearing
Working on life-size pieces changes the math: more surface area means longer masking sessions and clear coats applied in stages rather than one pass. We’ve found that choosing the right clear for large statues matters as much as the chrome layer itself, since fogging and uneven cure show up fast on big, continuous surfaces.
Why we favor sealed metallic finishes for wearable and display pieces
For wearable armor, we lean toward graphite or Alumaluster sealed under 2K clear since it survives handling better than unsealed spray chrome. For static display pieces, a glossy, mirror-polished finish reads best under room lighting and needs only occasional dusting to stay sharp.
— Dominick
Commission a finished chrome-grade piece from our team
If the sanding, timing windows, and solvent safety above sound like more shop time than you want to invest, finished life-size figures, masks, and props can provide the chrome look without running the process yourself.
Every piece goes through full surface prep, metallic or chrome finishing, and sealing before shipping, and large pieces are packed to survive transit without damaging the finish. Explore our full lineup of life-size figures, masks, and cosplay pieces and request a quote for a custom character build finished to a shine you won’t have to chase yourself in a home shop.
FAQ
How do you sand 3D prints smoothly?
Start with 220 to 320 grit to remove print defects, then progress through 400 and 600 grit before finishing with a wet sand at 1000 to 2000 grit for a mirror-ready surface. Filling seams and pinholes between coarse and fine grits, as outlined in our layer line guide, prevents flaws from telegraphing through the final finish.
Can you drink from a PETG cup safely?
PETG is generally considered a food-contact-safe plastic in its raw form, but a 3D-printed cup has layer lines and tiny gaps that can trap bacteria and are difficult to fully sanitize. Most makers treat printed PETG vessels as display pieces rather than everyday drinkware for that reason.
Is there a chrome PLA filament?
No standard filament prints chrome straight off the nozzle with a true mirror finish; “chrome” PLA filaments on the market typically give a muted metallic sheen, not the reflective look of plated or spray-chromed parts. For an actual chrome appearance, post-processing with spray chrome, Alumaluster, graphite, or plating is still necessary.
Why would a browser setting affect a “chrome” search, not a 3D print finish?
This question usually points to Google Chrome the web browser rather than a chrome finish on a printed part, and browser login or network issues are unrelated to print finishing. If you’re troubleshooting a browser, check your Chrome app’s update status and network connection rather than anything related to 3D printing materials.
What should you check before choosing a chrome finishing method?
Match the method to how the piece will be used: unsealed spray chrome suits static display, while graphite or Alumaluster sealed under 2K clear holds up better on wearable or handled pieces. Confirm your print material is compatible, since true electroplating needs a platable plastic like ABS, while paint-based methods work on most surfaces after proper prep.
Sources
- Electroplating 3D prints: All you need to know | All3DP
- Chrome for 3D Prints: The Graphite and Alumaluster Paths – Foxhead Workshop
- Make 3D Prints Look Like Chrome and Steel - Core Electronics
- Electroplating 3D Prints For Perfect Faux Chrome - Make
- Protecting Workers during spray painting operations (OSHA)