
Weekend Props $25 to $60: Cosplay Prop Materials for Beginners

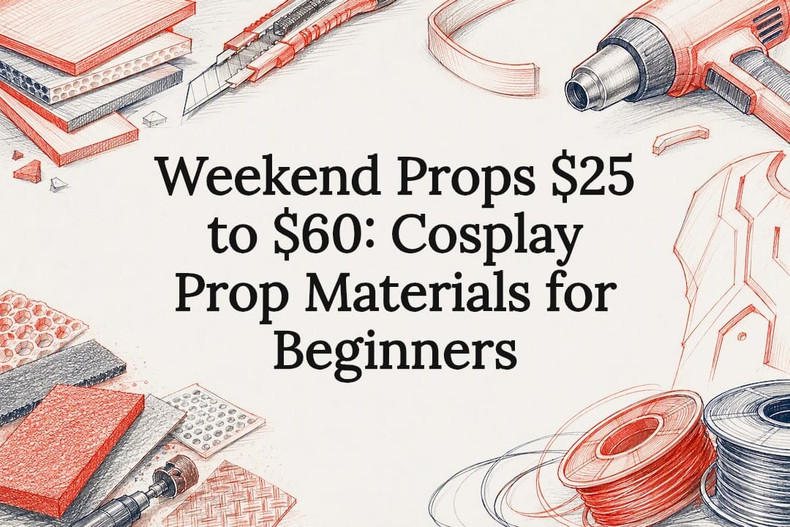
Start with EVA foam for armor and blades, thermoplastics like Worbla for hard organic shapes, and FDM 3D printing for crisp hard-surface detail. These three cover almost every early prop build without demanding a full workshop. Expect small pieces to run $10 to $30 in materials and a first weekend build to eat most of a Saturday once cutting, gluing, and priming are done.
TL;DR:
- High-density EVA foam in 2mm, 5mm, and 10mm is the most cost-effective and shape-retentive material for beginner armor and prop building, with typical costs between $10 and $60.
- Worbla thermoplastics are ideal for curved, detailed surfaces but are more expensive, heavier, and require sealing before painting, often used in combination with foam structures for organic shapes.
- FDM 3D printing is suitable for complex, precise, or symmetrical parts like helmets and gun frames, but finishing costs and time often surpass the initial material savings.
- Resin casting becomes profitable only when producing multiple copies, with silicone molds capturing fine detail and resin parts becoming more economical after the first, more costly mold.
- Proper storage, transportation, and safety precautions are crucial, as foam and Worbla need flat support, and heat-sensitive materials like resin and Worbla can warp or crack if not handled carefully.
Table of Contents
- 1. EVA foam: which grades to buy and how to shape it
- 2. Thermoplastics (Worbla and similar): shaping, strengths and limits
- 3. 3D printing for props: FDM vs resin and what each does best
- 4. Resin casting and molds: when multiples justify the effort
- 5. Fabrics, upholstery foam and mesh: plush forms and wearable bases
- 6. Structural cores, cardboard, wood and metal for rigid props
- 7. Adhesives and joining methods for every substrate
- 8. Painting and finishing: primers, coatings and weathering
- 9. Tools, workshop setup and safety for sprays and resins
- 10. Practical 3D printing know-how and when to commission finished prints
- 11. Material durability and maintenance tips
- 12. Environmental impact and sustainability considerations of cosplay materials
- 13. Storage and transportation precautions for different prop materials
- Author perspective: a suggested learning path for beginners
- How 3D Curio Prints can help with finished prints and commissions
- Sources
- FAQ
1. EVA foam: which grades to buy and how to shape it
Most beginners waste money on the wrong foam before they ever touch a heat gun. Craft foam, the thin sheets sold at hobby stores, tears easily and does not hold a heat-textured surface. High-density EVA foam, the kind cosplay makers specifically recommend, keeps its shape under a heat gun and accepts paint far more evenly.
Thickness depends on the job. Use 2mm sheets for fine surface details like rivets and panel lines, 5mm for the main body panels on armor pieces, and 10mm when you need bulk, such as pauldrons or gauntlet cuffs. For rigidity inside larger pieces, PVC pipe or wooden dowels give you a core that will not flex or snap under normal handling.

Basic joining at this stage is simple: contact cement for foam-to-foam seams, and heat sealing (running a heat gun along the edge to fuse foam edges) for a cleaner bond on curved pieces.
High-density EVA foam rated at 156 kg/m³ reliably holds heat-tool texture and paint, unlike thin craft foam that most beginners default to first.
A basic starter kit looks like this:
- High-density EVA foam sheets in 2mm, 5mm, and 10mm thicknesses.
- A heat gun for shaping and texturing.
- Contact cement and a basic cutting mat with a hobby knife.
- PVC pipe or wooden dowel for internal rigidity on larger pieces.
Most foam weapons and simple armor pieces land in the $25 to $60 range in materials, which makes foam the cheapest place to build real skill before investing in pricier processes.
2. Thermoplastics (Worbla and similar): shaping, strengths and limits
Worbla is a thermoplastic sheet that becomes soft and moldable when heated, then hardens as it cools, holding whatever shape you pressed it into. That behavior makes it the go-to choice for organic curves and detail work that foam struggles to replicate cleanly, things like rounded pauldrons, horns, or layered ornamental trim.

The standard workflow pairs materials rather than replacing one with another: build a foam base for bulk and structure, then heat a thin Worbla skin over the top for a smoother, paintable surface. Scraps are not wasted either. Reheating offcuts and fusing them together lets you sculpt small details without buying new sheets for every add-on.
Worbla comes with real trade-offs against foam:
- It costs noticeably more per square foot than EVA foam.
- It adds weight, which matters on pieces worn for hours.
- It softens again in direct sun or a hot car, so finished pieces need care in storage.
- It needs sealing before paint will hold evenly, adding a prep step that foam does not require.
Pro Tip: Keep a small offcut of Worbla in your kit at all times. It is the fastest fix for a cracked edge or a detail that snapped off mid-convention.
3. 3D printing for props: FDM vs resin and what each does best
3D printing earn its place once a prop needs sharp geometric edges, symmetrical parts, or a level of detail that foam and Worbla can’t reproduce by hand. The two common processes solve different problems.
- FDM printing (using PLA or PETG filament) builds parts layer by layer and suits helmets, gun frames, and other hard-surface pieces where visible layer lines can be sanded away.
- Resin printing (SLA) cures liquid resin with light and produces far finer detail, making it better for small props like badges, jewelry, or intricate hilts, though print beds are smaller.
Neither comes out of the printer ready to wear. Post-processing typically takes as long as the print itself, running through sanding, filler application, a smoothing coat such as XTC-3D, and multiple rounds of primer before paint goes on.
Finishing labor commonly costs more than the filament itself, since raw prints are cheap to produce but expensive to finish properly. Budget several hours of sanding and priming for anything larger than a small accessory.
Filament itself is inexpensive, and a mid-range FDM printer covers most beginner needs. Readers comparing filament types for surface quality and color options can look at options like ABS filament in various colors to see how material choice affects finish. When a build calls for a full helmet or a complex piece you don’t have printer time or patience for, commissioning a finished print from a specialist often costs less in frustration than fighting a first attempt alone.
4. Resin casting and molds: when multiples justify the effort
Casting only makes sense once you need more than one copy of the same piece. A silicone mold captures the detail of a sculpted or 3D-printed original, and urethane resin gets poured into that mold to produce copies. It is a two-stage investment: mold-making materials and the master pattern cost money upfront, but each additional resin copy after that is cheap.
That math flips the cost curve compared with printing or foam building. Resin casting pays off specifically for multiples: a single badge or prop head costs more to cast than to hand-build, but the fifth or tenth copy costs almost nothing extra.
- Silicone mold rubber captures fine surface detail from the original.
- Urethane resin is the standard pour material for cosplay-scale casting.
- Air bubbles trapped in the mold are the most common casting failure, usually fixed with a pressure pot or careful de-airing.
- Demoulding too early, before the resin fully cures, tends to tear thin or detailed sections.
5. Fabrics, upholstery foam and mesh: plush forms and wearable bases
Not every prop is rigid. Mascot heads, plush accessories, and soft costume padding call for upholstery foam, which you carve or layer to shape a soft silhouette and then cover with fabric rather than paint directly.
- Upholstery foam holds shape better when covered with stretch fabric than when painted, since paint cracks on flexible foam over time.
- Window screen mesh, the fiberglass kind rather than aluminum, gives lightweight support for masks and helmet linings without adding real weight.
- Metallic lycra and other stretch fabrics work well as costume covers over foam bases, hiding seams while keeping movement free.
6. Structural cores, cardboard, wood and metal for rigid props
Large props need an internal skeleton or they sag, warp, or snap under their own weight. PVC pipe and wooden dowels are the standard choices for straight sections like staff handles or gun barrels, while thin aluminum rod handles curved internal supports where wood would split.
- Cardboard works well for cheap mockups and test fits before committing to final materials.
- PVC and dowels give straight props like staffs and rifles a rigid spine that resists bending.
- Aluminum rod bends into curves for internal support inside helmets or armor without adding much weight.
- Reinforce any core by anchoring it with hot glue plus a wrap of tape or fiberglass mesh where it exits the shell.
7. Adhesives and joining methods for every substrate
Different materials need different glue, and using the wrong one is the most common reason a prop falls apart at a convention.
- Contact cement is the primary adhesive for EVA foam. Apply to both surfaces, let it tack, then press together for a bond that will not peel.
- Hot glue works as a secondary or repair adhesive, useful for quick fixes but weaker over time than contact cement on foam seams.
- Epoxy or cyanoacrylate (CA) glue bonds plastics, resin parts, and 3D prints where contact cement won’t hold.
- Two-part epoxy is the choice for structural joins, anywhere a piece needs to survive being worn, dropped, or leaned on.
- Mechanical fasteners, such as magnets, snaps, or bolts, work best for modular pieces you need to remove for travel or storage.
Sand or scuff glossy plastic and resin surfaces before gluing. A smooth surface gives adhesive nothing to grip, and that single step prevents most bond failures.
8. Painting and finishing: primers, coatings and weathering
Paint failure usually traces back to skipping the right primer. Flexible primers are made for foam and Worbla, since rigid primers crack the moment the material bends. 3D prints need a filler primer, or a coat of a filling product like XTC-3D or Bondo first, to smooth layer lines before primer even goes on.
- Flexible acrylic primers and paints move with foam instead of flaking off.
- 3D prints benefit from XTC-3D as a smoothing coat, followed by filler primer and light sanding between coats.
- Bondo (or a similar body filler) fills gaps and layer lines on prints but adds weight if overused.
- Match your clearcoat to the base material. A rigid clearcoat over flexible paint on foam will crack at the first bend.
Pro Tip: Test your primer and paint combination on a scrap piece of the same material first. A crack on a test scrap costs nothing; a crack on the finished piece means starting over.
9. Tools, workshop setup and safety for sprays and resins
A functional cosplay workshop does not need to be large, but a few tools cover most jobs: a heat gun for foam and Worbla, a rotary tool like a Dremel for detail sanding and cutting, a self-healing cutting mat, and a mix of hand and orbital sanders for prints and resin parts.
Safety matters more here than most beginners expect. OSHA guidance calls for engineering controls and personal protective equipment during spray and painting operations, including respirators rated for the chemicals in use, chemical-resistant gloves, and full-body coveralls when spraying finishes.
- Work in a ventilated space, ideally an open garage, spray booth, or outdoors, never a closed bedroom.
- Wear a respirator rated for organic vapors when spraying resin, primer, or solvent-based paints.
- Chemical-resistant gloves and eye protection are non-negotiable for resin mixing and spray sessions.
- Avoid spraying near open flames or spark sources when using low-flash-point solvents.
Nearly every serious finishing step in this guide, spraying primer, mixing resin, sanding filler, involves airborne particles or vapors that OSHA-aligned guidance treats as a PPE requirement, not an optional precaution.
10. Practical 3D printing know-how and when to commission finished prints
Print time is rarely the bottleneck. Finishing labor typically dominates both the cost and the calendar time on a 3D-printed prop, often stretching a project across several sanding and priming sessions after the printer has already finished its job.
Wearable pieces, especially helmets, live or die on measurement accuracy. Head circumference and crown height need to be measured before printing, since a shell printed to the wrong dimensions usually means a full reprint rather than a quick fix.
- Measure head circumference and crown height with a soft tape before sending anything to print.
- Budget more hours for sanding and priming than for the print itself.
- Commissioning a finished print from a specialist maker skips the finishing hours entirely and delivers a piece ready to wear or display.
11. Material durability and maintenance tips
Different materials fail in different ways, and knowing the failure mode ahead of time saves a prop mid-convention. EVA foam holds up well to normal handling but degrades under repeated flexing at the same crease, so store pieces flat or on a form rather than folded. Worbla resoftens in heat, meaning a hot car trunk or direct sun for hours can warp a shape that took days to get right.
3D-printed parts, especially FDM prints, are strong under compression but can snap along layer lines if dropped at the wrong angle. Adding a fillet or rounding a sharp internal corner during modeling reduces that risk. Resin-cast pieces are generally the most brittle of the group and chip at thin edges, so a light coat of clear sealant helps protect edges that see the most handling.
General maintenance across materials comes down to a few habits: wipe down painted surfaces with a soft, dry cloth rather than solvents, touch up chipped paint before the bare material is exposed to moisture, and check glued joints between events since repeated wear and travel stress seams faster than static display use. A prop that gets touched up after every convention lasts for years; one that gets ignored until it visibly fails usually needs a full rebuild.
12. Environmental impact and sustainability considerations of cosplay materials
Foam, resin, and filament all carry an environmental cost that is worth weighing, even in a hobby built around reuse and creativity. EVA foam and PLA filament are not readily recyclable through normal municipal programs, and offcuts typically end up in the trash unless a maker specifically saves them for smaller projects.
A few habits reduce the footprint without adding much effort. Save foam and Worbla scraps for future detail work instead of discarding them, since both materials reheat and reshape well. PLA filament, derived from plant starch, has a lower production footprint than petroleum-based PETG or ABS, making it a reasonable default for prints that don’t need PETG’s added durability. Resin and its uncured runoff should never go down a drain; cured scraps and empty resin bottles need to go through hazardous waste disposal rather than regular trash, since uncured resin is a contaminant.
Buying secondhand tools, reusing molds across multiple projects, and choosing durable builds over disposable convention-only pieces all cut down on repeat material purchases over a cosplay career.
13. Storage and transportation precautions for different prop materials
How a prop survives the trip to a convention often matters as much as how well it was built. EVA foam and Worbla pieces should be stored flat or on a supportive form, never crushed in a bag, since both materials take a permanent set if bent for long periods.
3D-printed and resin parts travel best in padded cases with individual compartments, since rigid plastic pieces knocking against each other in transit is the most common cause of chipped paint and cracked details. Temperature matters more than most builders expect: a hot car trunk can resoften Worbla and warp thin resin pieces, so climate-controlled storage and transport beat convenience every time.
Large armor pieces and helmets benefit from foam-lined storage bins sized to the piece rather than generic totes, which reduces shifting during travel. For weapons and staffs, padded sleeves or tubes protect long thin sections from the bending stress that snaps PVC or dowel cores. A little care in packing avoids redoing days of finishing work over a single rough car ride.
Author perspective: a suggested learning path for beginners
Start small: a foam bracer or a simple foam weapon teaches cutting, gluing, and priming without much financial risk. Once that feels comfortable, add a 3D-printed detail piece, a buckle or emblem, to practice mixing materials. Save Worbla for your third or fourth build, after foam handling feels automatic.
Expect your first couple of projects to take a weekend each and always test paint and glue on scraps first.
— Dominick
How 3D Curio Prints can help with finished prints and commissions
Building every prop from scratch is rewarding, but it is not always the right call. When a project needs a life-size piece with heavy, convention-ready detail and you would rather skip the sanding and priming marathon, a finished commission is worth the trade-off in cost for the time saved.
The company builds life-size 3D-printed figures, masks, and props inspired by 80s and 90s pop culture, featuring customizable character options.
- Choose this route when you want a heavy, display-ready piece without extensive finishing labor.
- Customization options let you match a specific character or franchise rather than settling for a generic shape.
- It costs more upfront than a DIY build, but it skips the sanding, priming, and reprint risk.
Readers who want a finished, ready-to-display or ready-to-wear piece rather than a weekend project can browse the full lineup at 3D Curio Prints.
Sources
The safety guidance in this piece follows OSHA’s PPE recommendations for spray and painting operations. Material comparisons draw on Costumary’s cosplay materials breakdown and Feroca’s guide to cosplay materials, with cost figures from Costumary’s prop cost guide and finishing-time data from 3D Print Bounty’s commission guide.
- Personal protective equipment (PPE) guidance — OSHA
- Cosplay Materials guide — Feroca
- Cosplay Commissions: How to Vet a Maker and What to Pay
- How Much Does It Cost to Make Cosplay Props? | Costumary
FAQ
What is the best material for cosplay props?
There is no single best material since it depends on the shape you need. High-density EVA foam works best for armor and large panels, thermoplastics like Worbla suit organic curved shapes, and FDM 3D printing handles hard-surface detail like helmets and weapon frames best.
How do I make my own cosplay props?
Most beginners start by sketching or templating the shape, cutting it from high-density EVA foam, then shaping seams with a heat gun and joining pieces with contact cement. From there, prime with a flexible primer, paint, and seal, adding 3D-printed or Worbla details once the basic foam skills feel solid.
What is the golden rule of cosplay?
There is no single official rule, but a widely repeated principle among makers is to prioritize comfort and safety in a build over pure screen accuracy, since a prop or costume that hurts or restricts the wearer defeats its own purpose. Testing fit and materials on scraps before committing to a final build follows that same logic.
What materials are props made of?
Props typically combine a few core materials: high-density EVA foam for bulk and armor shapes, thermoplastics like Worbla for organic detail, 3D-printed PLA or resin parts for hard-surface pieces, and cast urethane resin when multiple identical copies are needed. Builders often mix two or three of these in a single prop to balance weight, cost, and detail.